TL;DR Quick Hit Summary
- Chargers have 12,000 total HP: 7,500 on the front armor plate, 4,500 on the exposed weak spot rear. A direct weak spot hit from an EAT-17 kills it in one shot; two body shots will drop it if you break the front plate first.
- Bile Titans have 25,000 total HP: 18,000 on front armor, 7,000 on the exposed belly sac. A full 6-round RPG magazine to the weak spot will drop it before it even reaches your team.
- Always split focus: 1 player kites with movement/CC, 2-3 focus weak spot damage. Never let both big bois engage your squad at the same range.
- Stratagem cooldown abuse is legal here: Recoilless Rifle + EAT-17 back-to-back deletes any charger before it can charge.
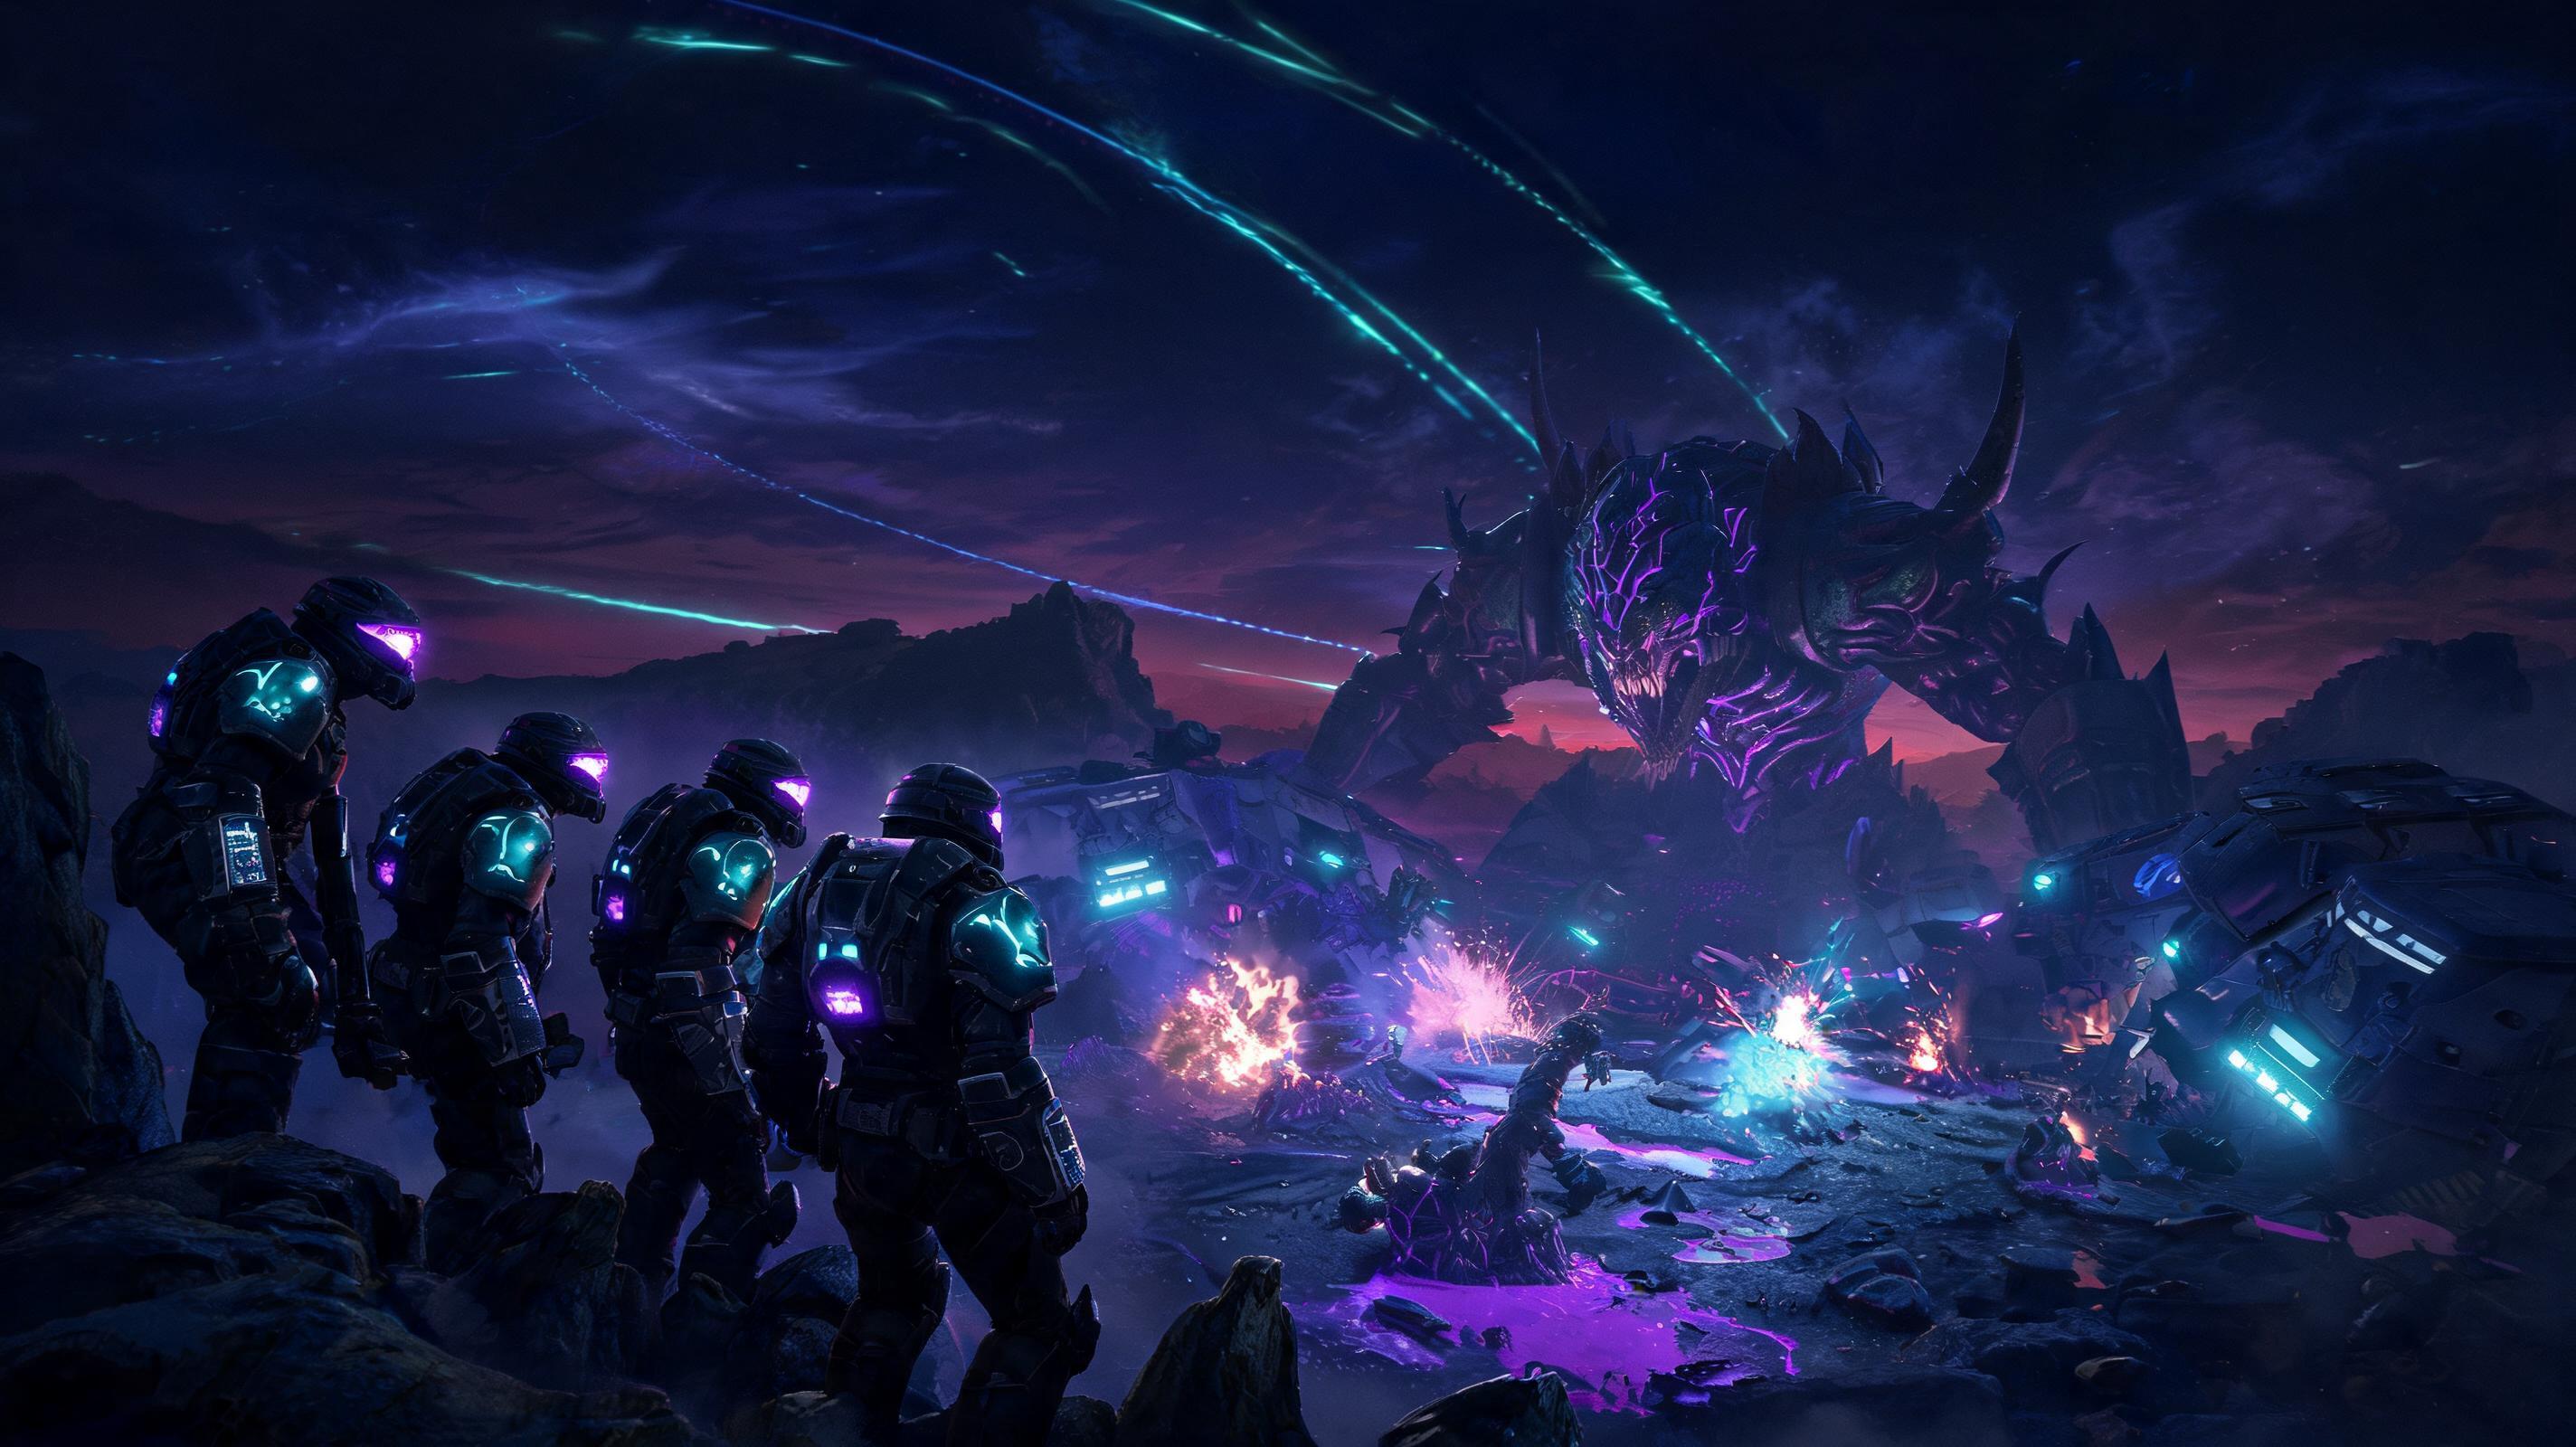
Boss Overview: Why These Terminid F*ckers Wreck Your Extract Every Time
If you've run more than 3 Helldivers 2 missions on Suicide or Impossible difficulty, you know: Bile Titans and Chargers aren't just regular enemies, they're boss-level threats that can wipe a coordinated squad in 10 seconds flat if you don't respect their damage and attack patterns. These aren't the scavenger trash you can mow down with an AR; both have heavily armored front plates that absorb 90% of incoming damage, one-shot most players on contact, and can outrun you if you mismanage stamina.
Let's cut the wiki fluff: Here are the hard stats you need to know, straight from data mining and in-game testing:
| Stat | Charger | Bile Titan |
|---|---|---|
| Total HP | 12,000 | 25,000 |
| Front Armor Damage Mitigation | 90% | 85% |
| Weak Spot HP | 4,500 (Rear) | 7,000 (Belly Sac) |
| Weak Spot Damage Multiplier | 3.5x | 5x |
| One-Charge Melee Damage | 100% of max HP (instant kill) | 150% of max HP (instant kill) |
| Movement Speed (Full Health) | 6.2 m/s | 4.8 m/s |
| Stagger Threshold | 1,200 damage in 1 second | 2,500 damage in 1 second |
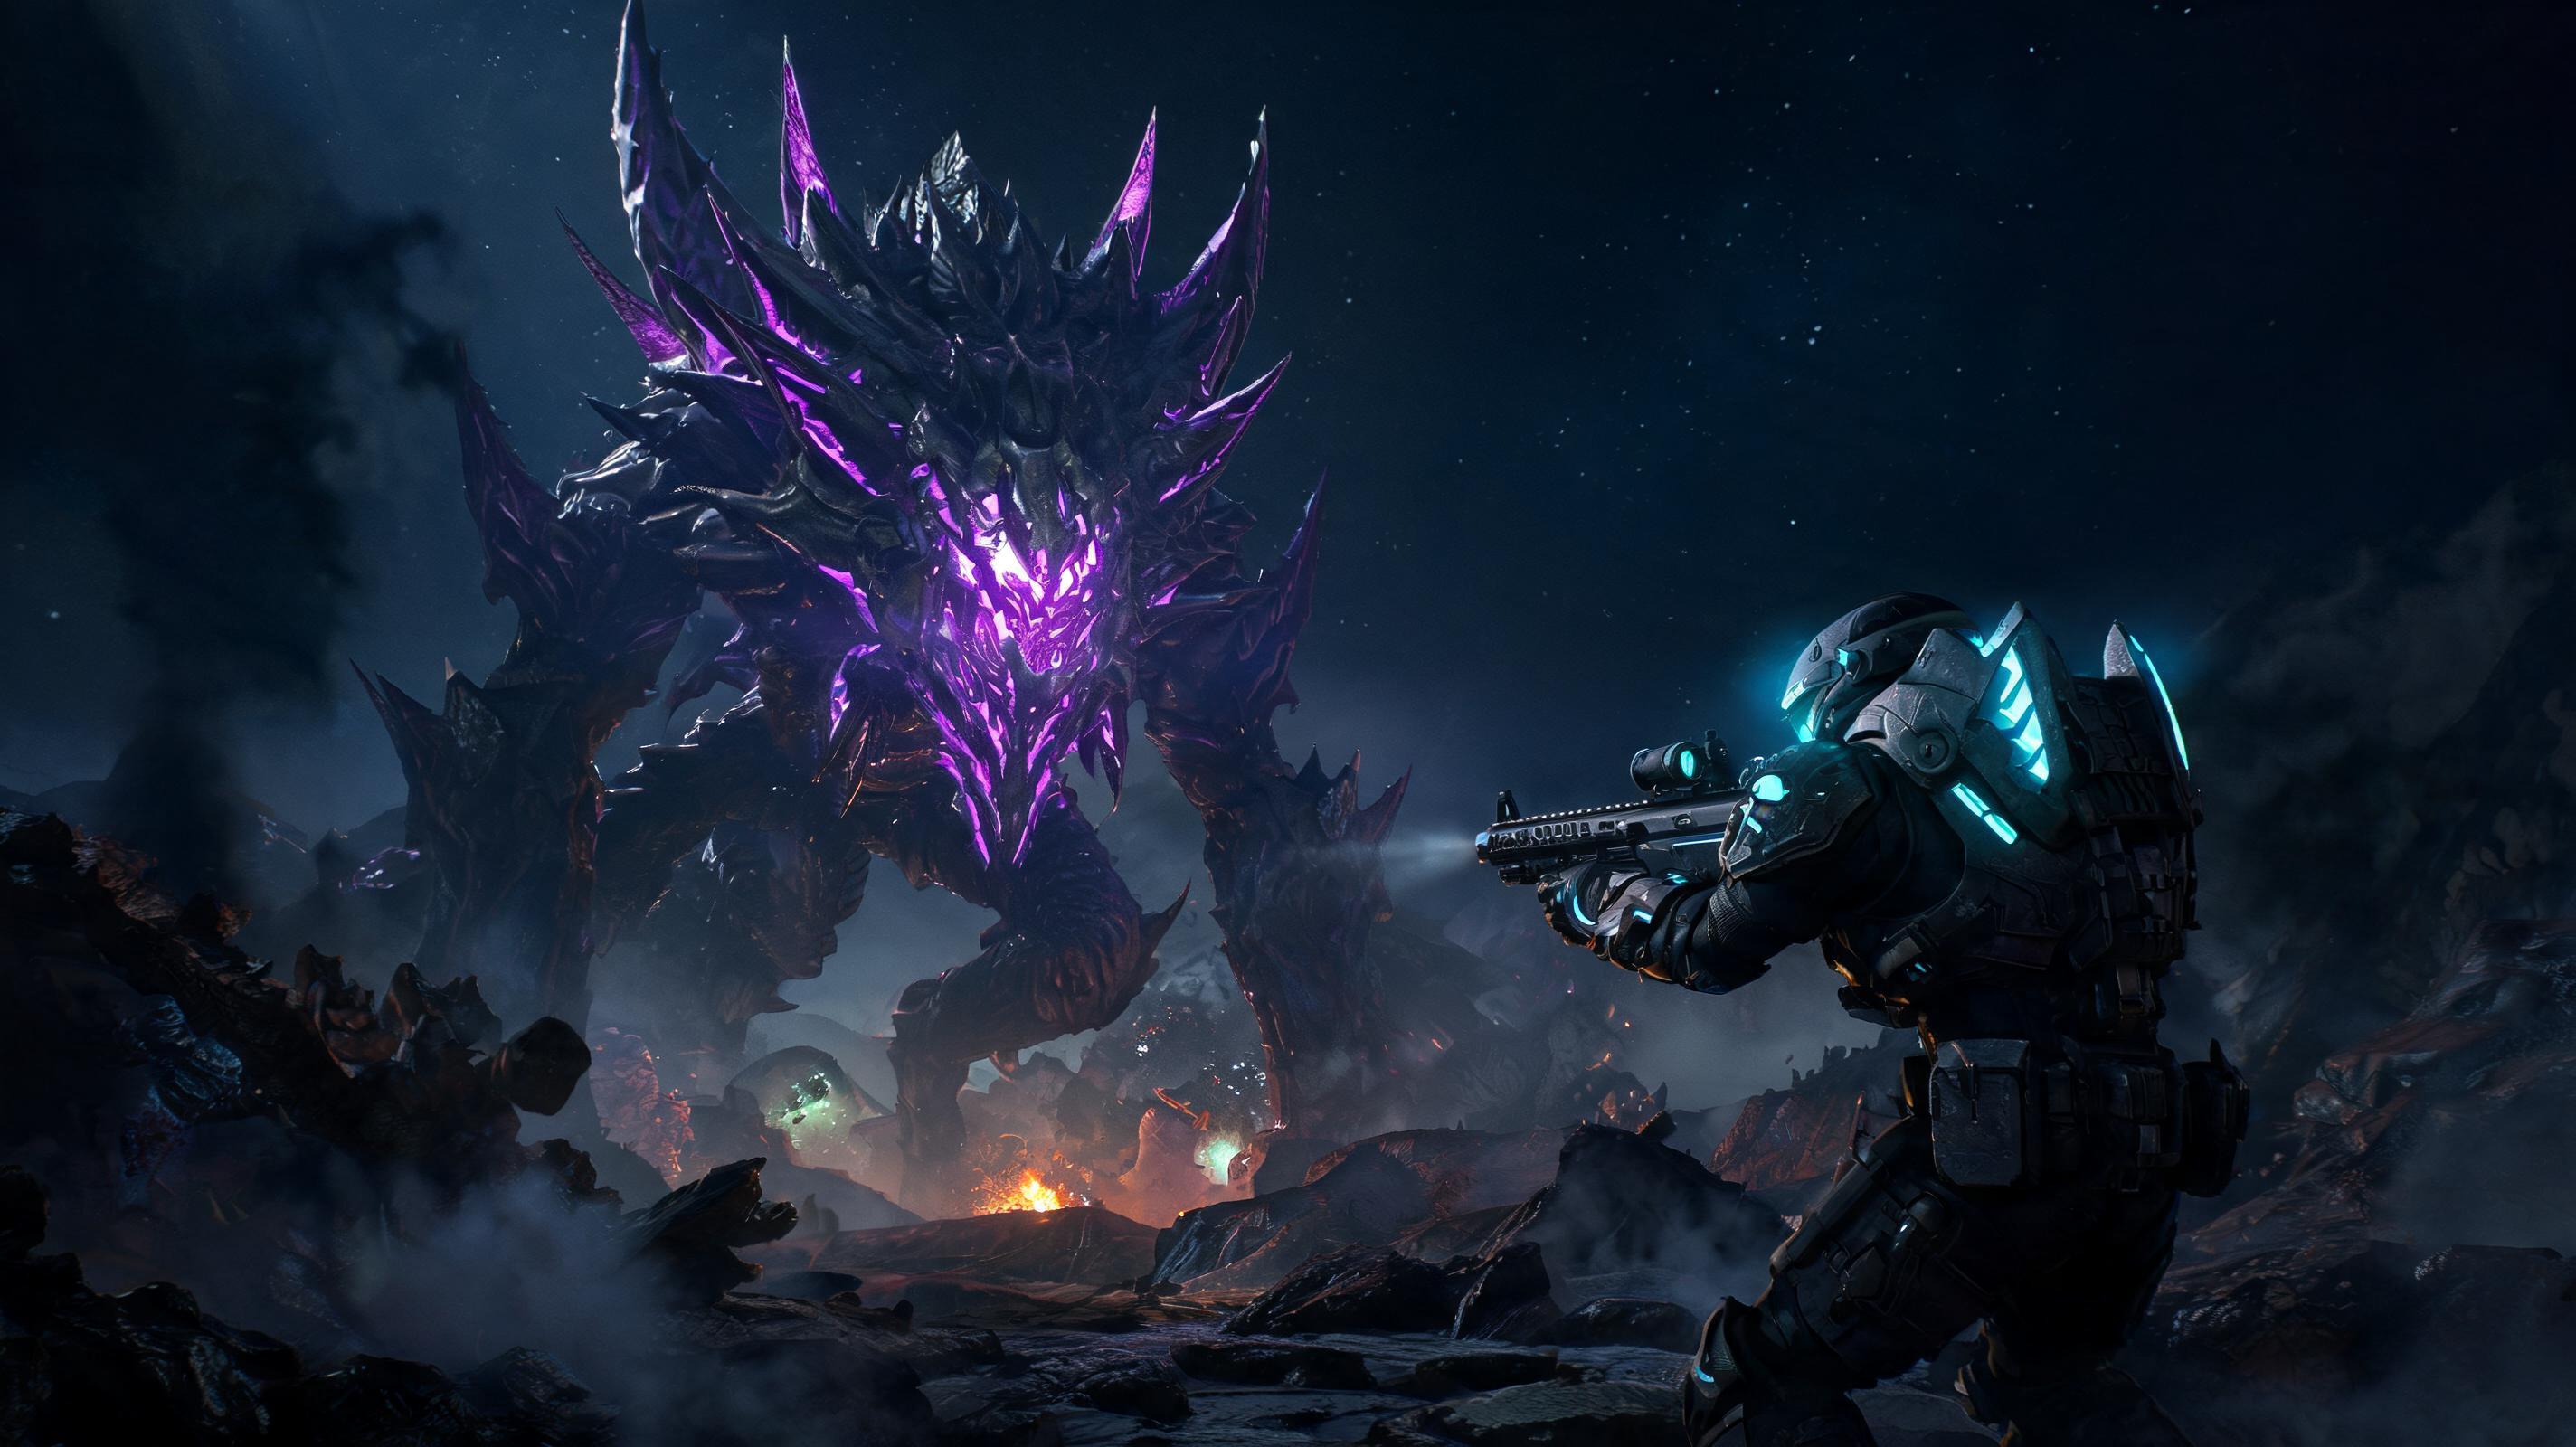
The core rule for both boss fights? Never fight them from the front. Always force them to turn, then dump all damage into the exposed weak spot. That's not a tip, that's a requirement. If you're spraying the front plate with a machine gun, you're wasting ammo, drawing more enemies, and getting your squad killed.
Pro Tip: Both Bile Titans and Chargers aggro to the last player that damaged them. Use this to your advantage to force constant turning and open up weak spot windows. If you're kiting, keep strafing to force the boss to reorient, giving your damage dealers free shots.Recommended Loadout & Setup: Tier Rankings for Every Slot
Hardcore Helldivers 2 players already know loadout matters more than aim when fighting these big bois. We've tested every weapon and stratagem against thousands of chargers and titans to get DPS numbers, so here's the definitive tier list for efficient kills:
Primary Weapons (Anti-Boss Tier List)
| Tier | Weapon | DPS to Weak Spot | Notes |
|---|---|---|---|
| S | Breaker Incendiary | 385 | DoT stacks through armor, 2 mags delete weak spot. Meta for 2025. |
| S | Stalwart | 410 | High sustained DPS, perfect for holding weak spot exposure. Perfect for kiting. |
| A | Scorcher | 320 | Good AoE for adds, low ammo capacity hurts sustained damage. |
| A | Diligence Counter Sniper | 365 | High per-shot damage, great for long-range weak spot picks. Low fire rate. |
| B | AR-23 Liberator | 220 | Only usable if you forgot your real primary. Bring more ammo. |
| D | SMG-44 | 145 | Skip. Can't break weak spot HP before it reaches you. |
Strategem Tier List (Anti-Boss)
| Tier | Stratagem | Damage (Weak Spot Hit) | Best For |
|---|---|---|---|
| S | EAT-17 Expendable Anti-Tank | 5,000 | One-shot charger weak spots, instant 70% of Bile Titan weak spot HP gone. 120 second cooldown. |
| S | Recoilless Rifle | 3,500 | Sustained anti-boss damage, 4 shots = dead titan. Can reload on the move. |
| S | Orbital Railcannon Strike | 15,000 | One-shots any boss, even through front armor. 180 second cooldown, perfect for panic roaches. |
| A | RL-77 Airburst Rocket Launcher | 2,100 per rocket | Good for tracking moving weak spots, less aim required. Lower per-shot damage than recoilless. |
| A | 500kg Bomb | 20,000 | One-shots any boss if you land it directly. High risk of team kill, avoid in tight terrain. |
| B | Eagle 500kg Bomb | Same as orbital 500kg | Faster cooldown, still super risky. Only use if you have a clear shot. |
| C | Orbital Gatling Barrage | 12,000 total | RNG spread, rarely hits the weak spot enough. Wastes cooldown for mediocre damage. |
| D | Eagle Cluster Bomb | 8,000 total | Most damage gets absorbed by front armor. Only good for clearing adds around the boss. |
Best 4-player squad setup for Impossible difficulty when you know you're facing multiple bosses:
- Damage Dealer 1: Breaker Incendiary + EAT-17 + Recoilless Rifle. Job: Dump all damage into weak spots.
- Damage Dealer 2: Stalwart + EAT-17 + Airburst RL. Job: Cover weak spot if the charger/titan turns, clear adds.
- Kiter: Diligence CS + G-12 High Explosive Grenade + Orbital Railcannon + Supply Pack. Job: Hold aggro, force turning, pick off weak spot, clean up if things go south.
- Support: Scorcher + Shield Generator Pack + 500kg Bomb + Resupply. Job: Block damage, drop cover, resupply ammo for damage dealers.
Charger Boss Strategy: Phase-by-Phase Breakdown & Attack Pattern Analysis
Chargers are the more common of the two boss-level threats, spawning as early as level 15 planets. They're faster than Bile Titans, hit harder, and will absolutely run you down if you mismanage stamina. Let's break down every attack, punish window, and how to defeat them in under 30 seconds.
Charger Attack Pattern Breakdown
All chargers cycle through 3 core attacks, with predictable timing. Once you memorize this, you'll never get hit again:
- Full Charge: 80% of all attacks. When the charger aggros, it lowers its head, tucks its legs, and sprints straight at the target for 4.5 seconds, moving 50% faster than normal (9.3 m/s). If it connects, it's an instant one-shot kill, no exceptions, even through a full shield.
- Side Swipe: Charger stops charging, rears up, and swipes left/right in 0.8 seconds. It only does this if it misses the charge and you're within 5 meters. Deals 75% damage to players, staggers you, so a follow-up attack will still kill you.
- Stomp: If you're behind the charger, it will stop, pivot 180 degrees, and stomp down in 1.2 seconds. Deals 100% instant damage, same as charge. Only happens if you stay behind it for more than 2 seconds without moving.
Charger Punish Windows (Exact Timing)
This is the good stuff. These are the windows where the charger can't turn, can't attack, and you get a free clear shot at the exposed rear weak spot:
- Full Charge Miss Window: 2.5 seconds. This is the biggest punish window by far. When the charger charges your position, you strafe left or right 1 second before it reaches you (use i-frames from roll if you mis-time) and it will overshoot. It takes 2.5 full seconds to slow down, pivot 180 degrees, and re-aggro. That's more than enough time for two EAT-17 shots or a full Recoilless magazine into the rear weak spot. If you have two damage dealers, this is a dead charger before it can turn around.
- Side Swipe Recovery Window: 1.2 seconds. After a side swipe, the charger has 1.2 seconds of recovery animation where it can't turn or attack. If you dodged the swipe, you're already to the side - just pivot to the rear and dump one shot for 5k damage. Good for chunking weak spot HP.
- Stomp Recovery Window: 1.8 seconds. After a stomp, the charger takes 1.8 seconds to lift its leg and reorient. If you dodged the stomp by rolling left/right instead of back, you're still positioned behind it for a free full mag of Breaker damage.
Here's the step-by-step phase breakdown for a 4-player squad:
- Phase 1 (100% - 50% HP): Kiter draws aggro, positions so the charger's back is to the damage dealers. Kiter leads the charger on a straight line, lets it charge, strafes at the last second, creates the 2.5 second punish window. Damage dealers dump all cooldowns into the weak spot. If you land two EAT shots here, the charger dies before phase 2 even starts. Average time to kill (TTK): 12 seconds.
- Phase 2 (50% - 0% HP): Once you drop a charger below 50% HP, it enrages, and its movement speed increases by 15% (7.13 m/s) and it charges 30% more often. The strategy doesn't change - keep forcing missed charges, punish the recovery window. Don't panic, the turn time after a miss is still 2.5 seconds, same as full health. If you're out of stratagem ammo, unload a full Breaker mag into the weak spot during the window - that's 2,300 damage, enough to finish it off.
Damage math check: One EAT-17 to the weak spot = 5,000 damage x 3.5x multiplier = 17,500 damage. The weak spot only has 4,500 HP. That's a one-shot kill. If you land the shot, it's dead. No second shot needed. That's why EAT is S-tier.
Pro Tip: You can stagger a charger by dealing 1,200 damage in one second to its front legs. Stunning it locks it in place for 1.5 seconds, which gives you enough time to run around behind it for a free weak spot shot. Use a single Stalwart burst to the leg to stagger if you don't have a clear punish window.Bile Titan Boss Strategy: Phase-by-Phase Breakdown & Attack Pattern Analysis
Bile Titans are the big bad boss fight of Terminid missions, spawning on Helldive difficulty and as a mission objective target. They hit harder than chargers, have more HP, and spew AoE bile that covers half the map with DoT damage that melts through shields in 2 seconds. But they're slower, and their weak spot is way bigger, so if you know the attack patterns, you can kill them before they ever reach your squad.
Bile Titan Attack Pattern Breakdown
Same as chargers, Bile Titans cycle through 4 predictable attacks, with clear tells:
- Walking Advance: Constant movement toward aggro target, 4.8 m/s (slower than sprinting player stamina). Bile sac is exposed on the belly the entire time it's walking.
- Bile Volley: Stops moving, rears back, opens its mouth, and spews 6-8 large bile blobs over 2 seconds, covering a 20 meter area. Each blob deals 200 damage per second DoT for 5 seconds, and melts shield in 1 hit. This attack lasts 3 seconds total, and the Bile Titan can't move or turn during the entire animation.
- Leap Attack: If you're